Tag: Projects
2012
05.17

A while ago I read this excellent article by Evil Mad Scientist Laboratories describing the need for some form of visual diff tool for open hardware projects. I had been thinking this was a great idea, but while working on a recent project, decided to actually start implementing something. I use the gEDA suite of tools, so that is what I’m creating this for, but the majority of the plumbing should be reusable for other file formats.

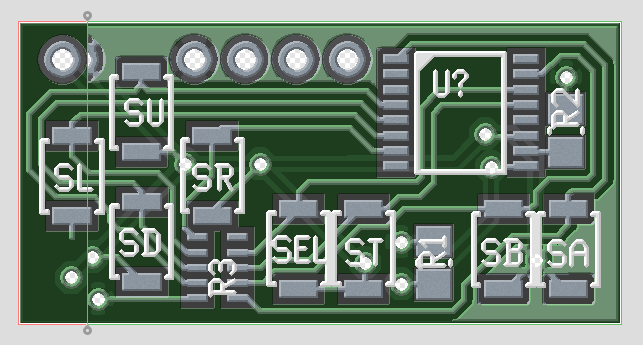
The first piece of this puzzle for me was automatically making image files of my schematics and PCBs that have changed and adding them to each commit. GitHub has image diffing capabilities built in, so this works great. I implemented this a pre-commit hook in .git/hooks/. My git hooks can be found here. I have designed them to work with the git-hooks tool by Benjamin Meyer.

This script seems to work fine for me, though I’m open to suggestions for improvements. My major issues with how the hooks work (which are more issues with git than my hook) are

  1. The status message in the auto-generated commit comments is not being updated with the new image files and
  2. Hooks don’t get pushed into remotes

The first issue feels like a bug to me, but I suspect that it was done intentionally for some reason I’m not aware of. I have played with a work around by adding a prepare-commit-msg hook that just regenerates the commit message comments, but I have tested the pre-commit hook enough that I don’t feel I need to be aware of the addition of the images.

The second issue I am told is a security issue as it would cause arbitrary code to be executed on the machines of others who might clone (and possibly even the server). One nice feature of the git-hooks tool is that it can use hooks in a local repo directory, so if you include my scripts in the git_hooks repository, you just need to run ‘git hooks –install’ and you will have the hooks working. Without that tool, you can just manually copy them into the proper file in the .git/hooks/ directory.

This method works well if I want to view visual diffs online, but sometimes I might be offline or perhaps I just don’t want to push my project to a public GitHub repo. For that, I plan to make some simple scripts that call visual diffing tools on my local repository. Git has the capability to set your git diff tool, so my plan is to write a wrapper script that picks the right tool based on file types. This script might also generate an image from files that cannot be diffed directly and don’t have the above auto generated files

Edit: Of course not 20 minutes after I publish this post I discover schdiff, a tool bundled with gEDA since the start of 2012 that is designed to hook into git-difftool to provide a visual diff of gschem .sch files. One format down, some more to go.  :)

Edit 2: Less than a day later and I discover there is also a pcbdiff tool on my computer that came with gEDA pcb. In Arch Linux, it installs to /usr/share/pcb/tools/pcbdiff, but it is not in the path, so in my .bashrc I just added ‘export PATH=”$PATH:/usr/share/pcb/tools”‘ at the end. I feel pcbdiff outputs images that are too low a resolution, plus it can’t handle when the .pcb files change in physical size, so I might submit a patch or two. Long story short, now I just need to make a script that auto-calls these diff tools based on the file type.
2011
10.06

Photo "borrowed" from Leif Norman (click image for source)

This past Saturday was Nuit Blanche here in Winnipeg. Some 30,000 people went around the city checking out various exhibits of art and culture. One of the exhibits at the art gallery was ARTcadia. A bunch of displays setup with indie games and hacks. I had the NES-chuck out again and it saw a lot of use. Click here for some more pictures from the WAG.

While similar to Re:Play, the core difference for this event was that the games were setup as displays rather than booths. Because of this, there wasn’t someone around to provide instructions on how to start the game (ie. how to access the start and select buttons). We had a sign up with some instructions, but few people showed any interest in reading the signs. I may have to re-evaluate how this thing works for any future public displays.

CBC was running a contest called “Culture Vulture” where you have to go to cultural events and text in the posted word for an entry. SkullSpace must be getting some attention because the keyword posted at the WAG was “hacker”.

2011
05.29

Picture by Brian Turchyn

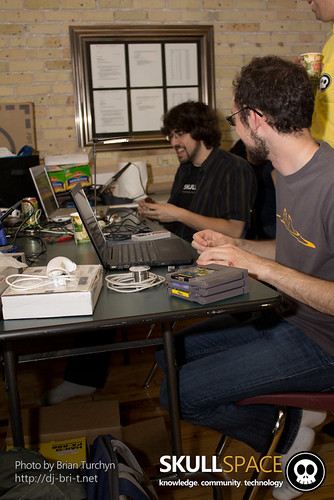
Last weekend was SkullSpace hackathon 6 and it was a great time. This hackathon was a less structured hackathon than we have had in the past and so myself and another fellow hacker decided ta get a full hack in, start to finish. The idea we had was to turn a Wii nun-chuck into a controller for the classic NES gaming system, thus dubbed the NES-chuck. While largely intended to be for our own amusement, the nun-chuck as NES controller does allow for one handed play meaning it could be a useful controller for people with disabilities (or for those who want to play two player co-op games by themselves).

By the end of the hackathon I had a working prototype system. It has a few timing related bugs that should be pretty easy to iron out. My intention is to make a much cleaner version to display at the Winnipeg Art Gallery on June 11 as part of the Re:Play event, an exhibit focused on gaming art and culture. I will try to post some pics and videos of the prototype and final versions shortly (the current, rough code can be found here). In the meantime, you should check out Re:Play here (scroll down on that page), here, and here. If you come down, you will be able to try the NES-chuck first hand (no pun intended)!

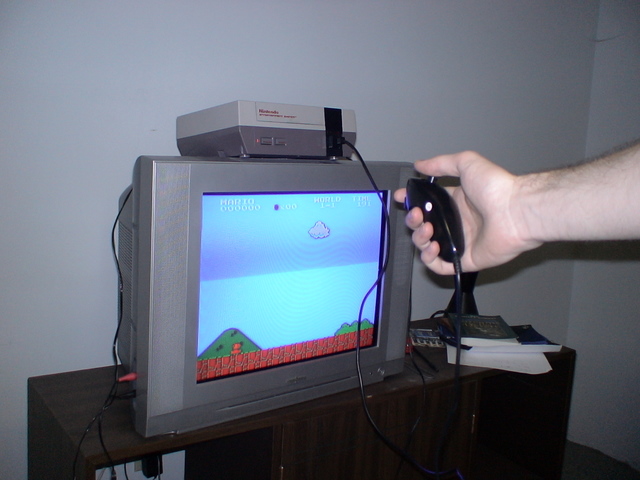
UPDATE: I was up late working on this thing and thought I’d share a quick picture I snapped of it. I still have some kinks to work out. The nun-chuck is a knock off from deal extreme and is a bit peculiar. I am likely talking to it wrong, but right now the z button inverts the response of the c button. Also, the accelerometer data is not very stable. None of these things were a problem with an authentic nun-chuck, so I’m sure I just need to change the config a bit.

2011
04.02

Last Sunday, UMIEEE together with UMARS (two University of Manitoba student groups I am a part of) got together to hold an embedded systems workshop on campus. We helped teach a bunch of fellow students the basics of designing and programming embedded systems. We used TI’s MSP430 Launchpad development kit, a super low price dev kit, so that everyone could go home with their project and continue experimenting. While the Launchpad (or rather the MSP430 microcontroller on the board) isn’t as easy to program as something like an Arduino, the Launchpad allowed us to convey some of the more fundamental principles of embedded design like bit masking and timer interrupts.

The morning consisted of getting the tools setup and getting a “hello world” application running. The official tools are Windows only, but the Launchpad does work with Mac and Linux once you figure out how to install everything. It actually seemed to work better, due partly to the fact that the tools are open source and hence not crippled versions of paid software, but also because the environment was less integrated (ie you use a text editor, a compiler, and a debugger all separately instead of a full blown IDE like they use in Windows). The Windows users ofter had to restart the whole IDE when one part of the system locked up for unknown reasons.

After lunch, we dove into making a much more ambitious project: an LED chaser. The design specifications we gave to everyone was something to the effect of “when you press a button, your chain of LEDs will light up one by one until you reach the final one in the string.” The idea was then to replace the final LED with the next person’s button input pin and watch as the lit LED ran across everyone’s boards. The day before, the volunteers leading the workshop got together and pumped out a quick (and admittedly buggy) code for this, so we felt it was an attainable project. We nudged everyone along, showing them how to light individual LEDs, use interrupt pins and timers, and wire up buttons with pull up resistors. I think only a few people actually got the final chaser working, but everyone had a good time.

You can see an abstract for the event along with a bunch more pictures here.

2011
02.04

WEC 2011

Last weekend I had the privilege of attending the 2011 Western Engineering Competition (WEC) at the University of Sasketoon. The activities were a blast and the Senior Design competition was great. After presenting our design, we felt that we did really well. The other teams also did great jobs and I’m sure it was very tough for the judges to make their final decisions. Sadly, we did not win, but we had a great time competing and getting to know fellow students from across the country. We took some video of our robot/tractor and I have embedded them below.

WEC 2011 – It’s alive! from Benjamin Bergman on Vimeo.

This was the first time we had our robot running in it’s final configuration at WEC 2011 Senior Design.

WEC 2011 – Hay Bail Challenge from Benjamin Bergman on Vimeo.

In this challenge, we had to remotely control the robot to lift a “hay bail” (a marshmallow, in this case) and place it in a small cup. This was one of the easier challenges for the day.

WEC 2011 – Pasture Crossing Challenge from Benjamin Bergman on Vimeo.

In this challenge, we had to remote control our robot tractor and drive it across the “pasture” (represented here by a steep, ~40˚ slope covered in a plastic tarp and a layer of very soft dirt). We had to avoid hurting any livestock or the environment (ie. the trees). While it looks like we did quite poorly, everyone got about the same distance on this one.

WEC 2011 – Grain Sorting Challenge from Benjamin Bergman on Vimeo.

In this challenge, we had to separate the “wheat” (marbles) from the “chaff” (rice) using our robot. The robots built by most of the other teams used the vex panels themselves (they have lots of holes) to filter out the marbles, but this was slow and required agitation. Our robot used some rails on end that left gaps barely wide enough to catch the marbles and let the rice immediately fall to the ground.

WEC 2011 – Manure Moving Challenge from Benjamin Bergman on Vimeo.

In this challenge, we had to remotely control our robot to move a pile of “manure” (loose dirt) from it’s initial location across a line. Our performance in this challenge was not great as it was hard to maneuver our robot in the tight space, plus our scraping mechanism did not reach as low as we would have liked.

WEC 2011 – Barrel Race Challenge from Benjamin Bergman on Vimeo.

In this challenge we had to autonomously get our robot to navigate a figure 8 around a pair of “barrels” (pop cans) and then complete a lap of an oval track. The oval was no problem, and in our testing we could do it very quickly, but the preceding figure 8 in the soft dirt made it impossible to line up for the lap. None of the competitors were able to complete this challenge. Since it was worth 50% of our demonstration mark, that put a lot of weight on our presentation.

WEC 2011 – Barrel Race Lap Demo from Benjamin Bergman on Vimeo.

After the competition, we wanted to demonstrate our completion of a lap of the barrel race track, just for fun. Some other teams also demoed their lap code, but ours seemed to be the fastest.

WEC 2011 – Attempted Marshmallow Destruction from Benjamin Bergman on Vimeo.

During building, we found that our gripper arm had a lot of torque, so after competition we tried to cut a marshmallow in half. Sadly, the gears kept slipping since we had stressed out all of our mounts during competition, but we had fun anyway.

WEC 2011 – Attempted Pop Can Destruction from Benjamin Bergman on Vimeo.

After competition we tried to crush a pop, but our gears kept slipping as the mounts had been stressed during competition.

WEC 2011 – ROV from Benjamin Bergman on Vimeo.

After playing with our robot for a bit, we decided to attach a phone to the arm. This clip was just to get a “first person” clip, but we later set up an IP webcam server from a phone to remotely control it. It was a bit laggy, but tons of fun.